
Connect Claude to your notes
Add a Notedigit repository to Claude as a custom connector. Claude finds the sign-in on its own, you approve it once in Notedigit, and Claude can search and read that repository — nothing else.
Before you start
- Notedigit is running on your server and the repository is connected (Check connection passed).
- You are assigned to the repository. Access is per user, per repository.
- You have copied the repository’s MCP endpoint: open the repository in Notedigit, find the MCP endpoint card, and copy the address on the MCP client tab.
The endpoint looks like this
https://notes.your-company.com/mcp/<repository-id>
-
Step 1: Add a custom connector
In Claude, open Settings → Connectors and choose Add custom connector.
Give it a name you will recognise in the connectors list — for example “Project Knowledge” — and paste the repository’s MCP endpoint as the MCP server URL.
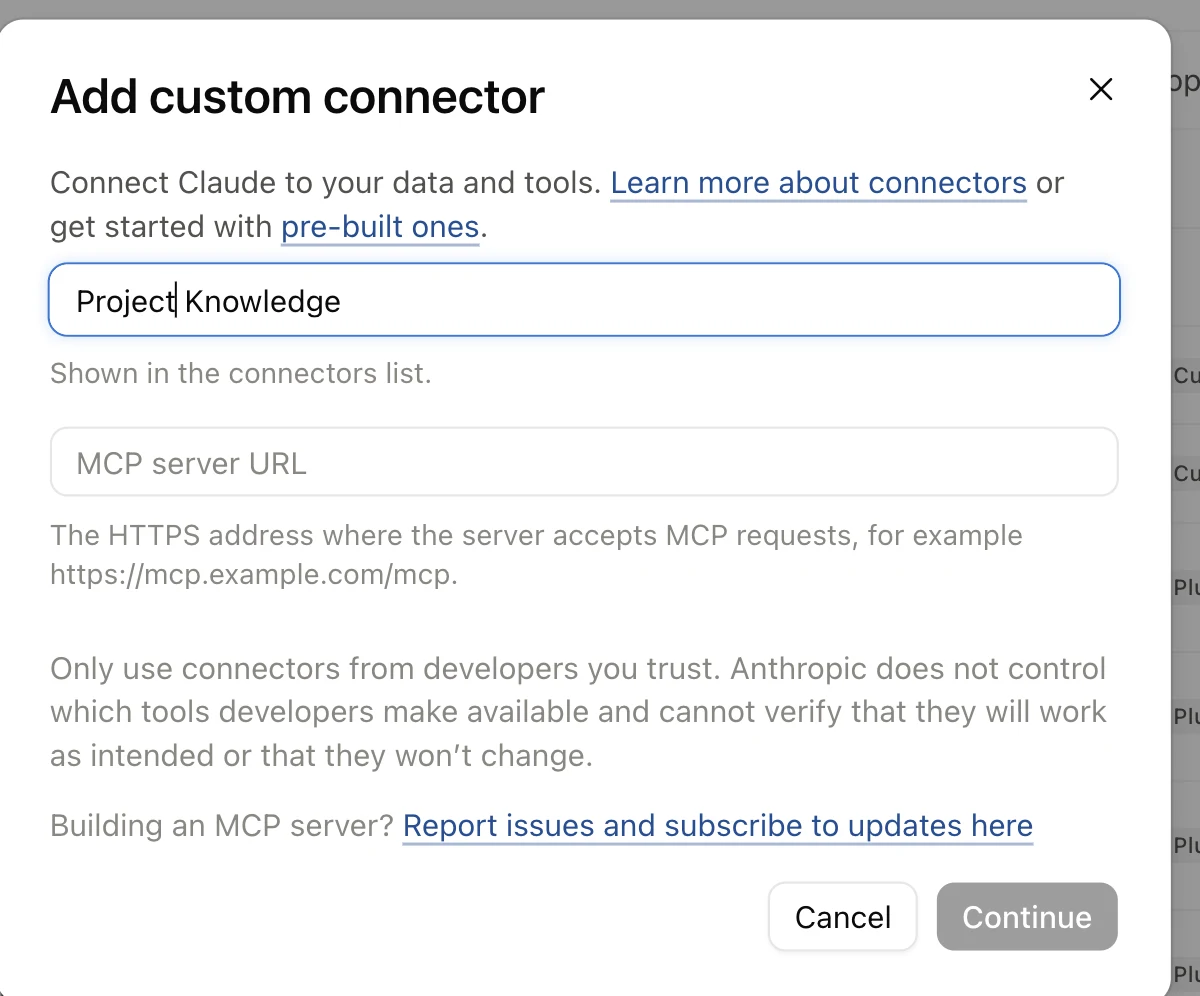
Screenshot with example values. -
Step 2: Keep the sign-in Claude detects
Claude reads Notedigit’s OAuth discovery and preselects the right options: Authentication on “Sign in now” and OAuth client on “Register automatically”. Both are marked Detected.
Leave them as they are. You do not need a client ID, a secret or any request headers.
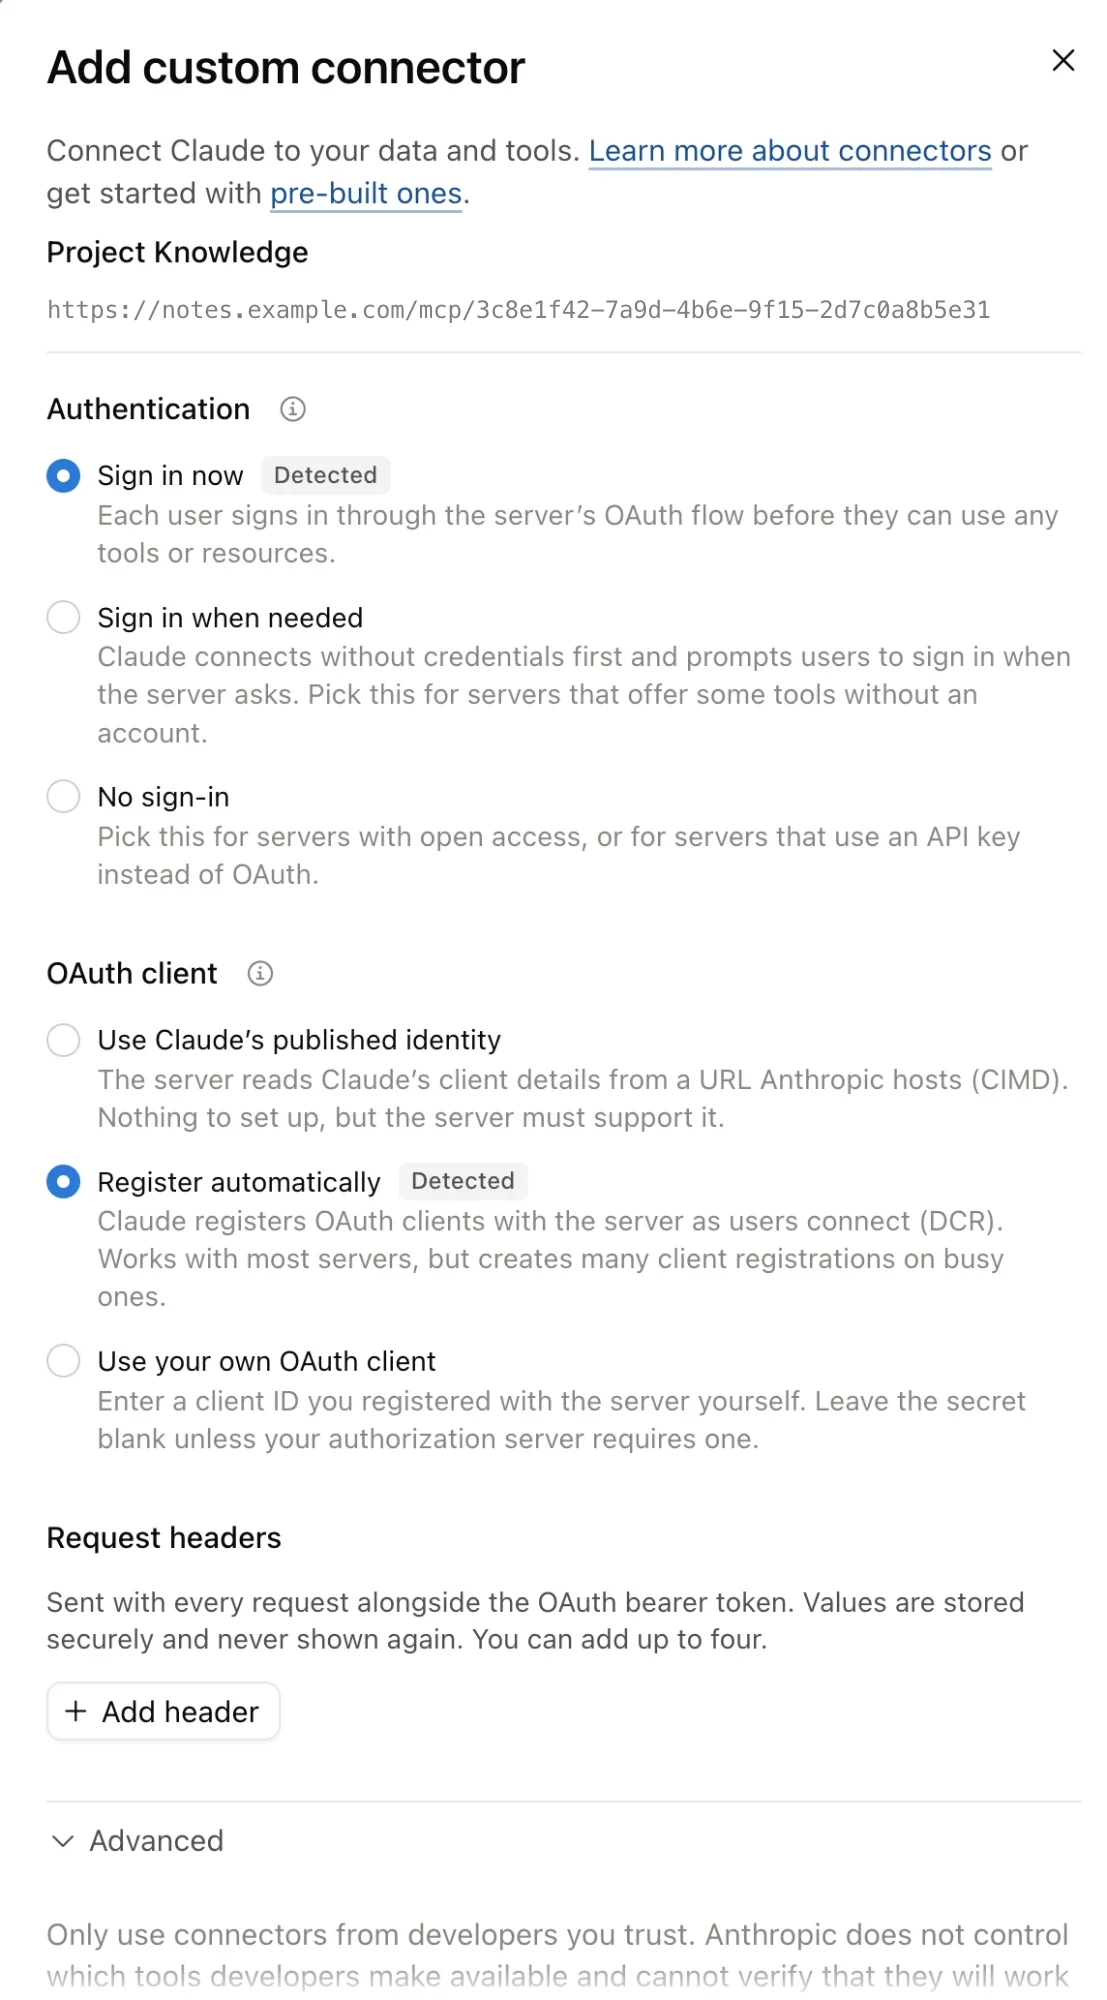
Screenshot with example values. -
Step 3: Connect
The connector is added, but you are not signed in yet. Open it and choose Connect.
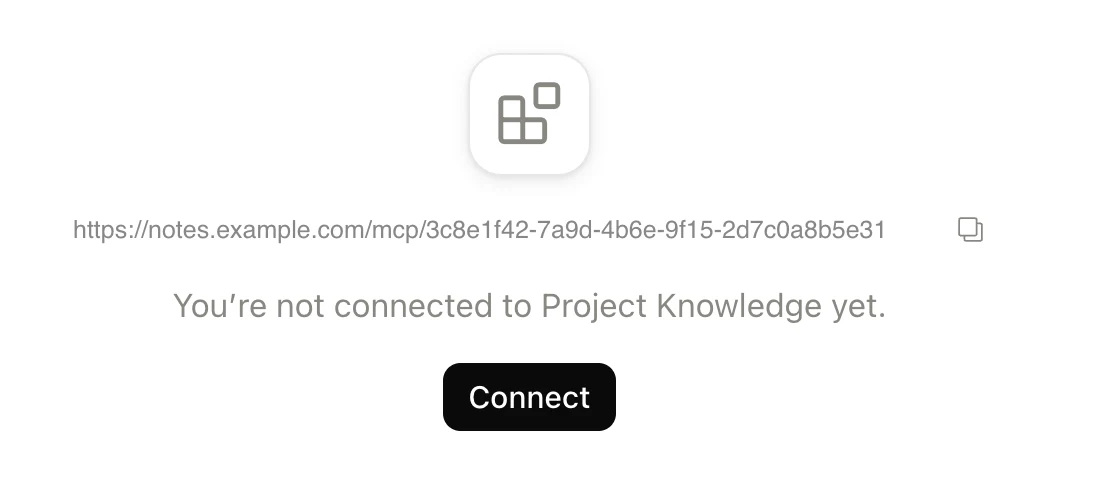
Screenshot with example values. -
Step 4: Continue in your browser
From Claude Desktop, your browser opens and asks you to finish connecting. Choose Continue connecting.
Finish the sign-in in a normal browser tab. Embedded or sandboxed browser views can block the approval form.
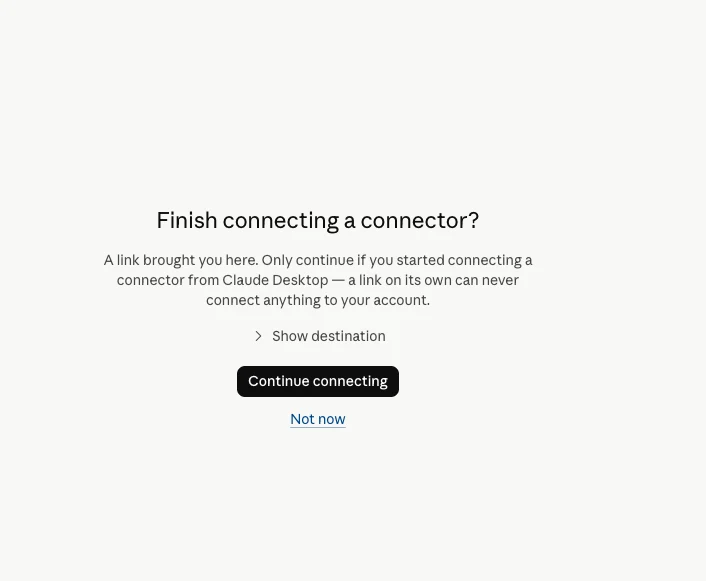
Screenshot with example values. -
Step 5: Authorize Claude in Notedigit
Sign in to your Notedigit account if you are asked to. Notedigit then shows what you are approving: the repository, the account you are signed in as, and where your browser goes next (https://claude.ai).
The first time anyone on your team connects an application, Notedigit marks it as an Unrecognized client. Continue only if you started the connection yourself.
Approving lets Claude read this repository — and any other repository you are assigned to — as you. Choose Authorize.
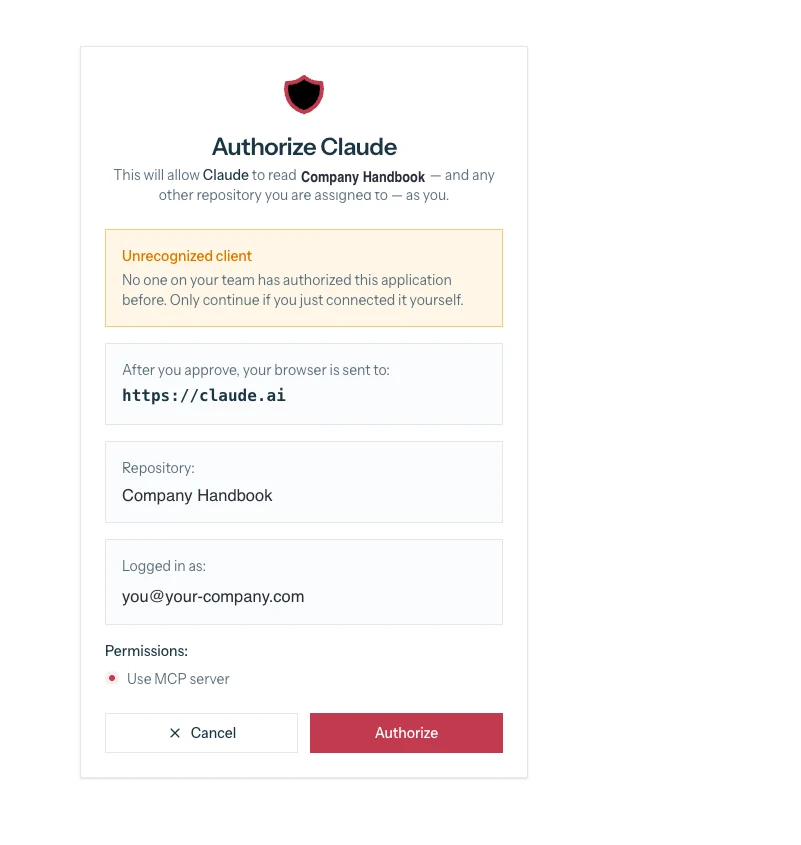
Screenshot with example values. -
Step 6: Ask Claude
Back in Claude the connector shows as connected, and Claude can use three read-only tools on your notes: search, read_file and list_files.
Ask the way you would ask a colleague who has the handbook open. Every call Claude makes is recorded in Notedigit under MCP connections: who asked, from which client, which tool and which note.